Wednesday, January 28, 2015

Pop Tops

Vicki and I started sewing on our twin Pop Stars quilts in November 2013. A little over 14 months later, we finally have our tops together. Hip hip, hooray!
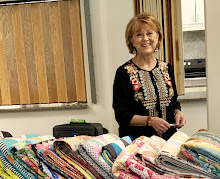
As, I've mentioned before, my wonderful friend, Vicki, and I try to sew chat shop together every Tuesday. This is our third project together. You can see the other two, here and here. We finished right as the sun was setting yesterday so hurried outside for a photo to mark the event!
We've taken some breaks during holidays and so forth, but always have Sew Day marked on our calendars. We even took our fabrics on a road trip to Ouray, Colorado, last spring for several days of back-to-back stitching!
Bright strips, cut 1.5 inches wide from my stash, were sewn down foundation-piecing style using instructions from Kathy Doughty in her awesome book, Material Obsession 2. Each block is 22 inches across!
Vicki had a collection of Civil War type fabrics that she wanted to use up for this project. We both adore how lovely it turned out by pairing the duller strips with the brighter, red polka dot stars! (Marble likes it, too!)
Seen from the back, the colorful seams show up so cute against the muslin foundations. I'm tempted to just topstitch down each seam since I'll be using my Pop Stars quilt as a tablecloth. Or, should I back it with flannel and leave out batting? It's already quite heavy.
Have any of you had experience with doing such a thing? I'd be interested in hearing your thoughts. Meanwhile, Vicki and I are planning our next Sew Day  project!

Thursday, January 22, 2015

Pin Cushion Pets

Remember Chia Pets? Well, today I showed a room full of ladies how to make Pin Cushion Pets!
 Using selvages saved from their fabric stashes, sixteen members of the Blue Valley Quilters Guild enjoyed a day of sewing and laughing as we created several projects from what some would call "trash". Many, who had never used selvages until today, may now be addicted to "quilting green"...using every last inch of that precious renewable commodity called fabric!
 Pin cushions seemed to be the favorite project for the day, especially the "Pets" crafted with zippers for heads and tails on a selvage body. Tiny buttons make the face and there is a loop in the tail for holding a seam ripper. The zipper pull becomes a tongue and, with the zipper part way open, you might think it resembles a cute snake (if there is such a thing!). We lined up some of them for a group photo (before their faces and tails were finished) along side their "square" cousins.
 Some of the projects will be donated and sold in the guild's Boutique during the Kansas City Regional Quilt Festival next June. (Are you making plans to attend?)
Just in case you'd like to make a Pin Cushion Pet for yourself, here are the instructions:

PIN CUSHION PET:
1.Cut a muslin rectangle 6 ½ inches X 10 ½ inches.Cover with selvages. (You might want to make these close together with only 1/8 inch of fabric color showing.)
2.Flip over and trim around muslin with rotary cutter.
Fold in half, RST, and stitch along the 10.5” side with 1/4” seam, leaving about 3 inches open in the center for turning.
3.Now you will be adding the zipper head and tail to make your pet: Making sure that the zipper is closed, cut off approx. 5 ½ inches of the tab section and pin it inside one end of the selvage tube with cut end aligned with the fabric edge. Do the same thing on the other end using about 4 inches of the bottom of the zipper.
4. Pin and stitch together both ends of the tube across the zipper teeth. Turn right side out and press. Fill the pet with about one cup of crushed walnut shells and hand-stitch opening closed using matching thread and small stitches.
5. Use tiny buttons to make eyes and nose on your pet. Create a holder for your seam ripper on the tail by tucking under the zipper end and using a button and thread that matches the zipper. Enjoy!
Are you a selvage saver like me?

Friday, January 16, 2015

Sunny Sewing

Is there anything better than sewing in the sun on a winter day?
 With all of the spokes finished, I've been having fun assembling Dresden plates from all of the low volume choices. The quilt will feature 12 plates on a soft grey dotty background. They go together quickly....five down and seven to go!
 The cute aqua Ikea cart that my hubby gave me for Christmas has come in handy for moving everything to my sunny dining room window for stitching.
 Meanwhile, Moose is waiting for a break in the sewing so that he can go outside for a walk. At five months old, he has grown so much that he looks like a big-boy dog already! (But don't be fooled...the puppy antics are never-ending!) In other news, I started a new project out of this fun applique book...
 Here's a teaser of what I'm working on... 
More about that next week. Moose is getting impatient and the sun is still out!

Friday, January 9, 2015

Let's Eat Cake

 I made a cake for Elizabeth today! She's the January Queen Bee for the Mid-Century Modern Bee. We're beginning our 3rd year of sewing together...saying good-by to a couple of gals and hello to some new ones. I'm looking forward to lots of great projects with this talented bunch of "mid-century" ladies!
 Last year, Carla asked us to make blocks for a whimsical sampler type quilt and Elizabeth enjoyed it so much that she wants one for herself. (I wouldn't mind one either!) I decided to try my hand at paper-piecing a layer cake using this free pattern by Ellison Lane.
 After printing off and taping together the five pattern sections, it was time to sew and assemble each layer of my cake. Elizabeth wanted bright colors along with a type-set background. I found lots to choose from among my stash as these are favorites of mine as well.
 Since type-set fabrics are generally directional, I knew that using it for paper-piecing would be a little bit of a challenge. But, because only two of the sections were triangles, it really wasn't too much of a problem if I laid out the fabric parts ahead of time. For some reason the numbers printed on the pattern seemed upside down to me and I got a little mixed up at one point but, all in all, it was an easy block to create. Wouldn't it be fun to have a whole quilt full of layer-cakes to use during birthday celebrations! Hmm...
 My block turned out a a little small for some reason and I'm hoping that it will work okay since I imagine that Elizabeth will be adding sashings to fit all the various blocks together. For good measure, I couldn't resist making a couple of filler blocks to send along in the mail.
 I'm looking forward to seeing what goodness the other MCM members will be sewing up this month.
 It will be delightful, I'm sure!

Saturday, January 3, 2015

Intentional

 PRIORITY was my "Word" for 2014 and it served me well as I navigated the 365 days of decisions making up my life. But evening has set on 2014 and it's time to choose a new Word of the Year to help guide me.
 Rather than make resolutions that probably will be forgotten and broken quickly, I've taken to choosing a word that might help to make me more faithful in all of life's choices for the coming year. INTENTIONAL is my new word. I'm really excited about applying it to so many areas of my life: quilting for sure, but also my health, home, time, marriage, friends, reading, spiritual life, photography, sewing, blogging, doggie, family...
How about you? Do you have a word for the year or a resolution? I'd love to hear. 2015, here we come!