Showing posts with label selvage. Show all posts

Friday, April 4, 2014

Selvage and Paper

 Ever thought about sewing selvages onto something made of paper?
 It's a quick and easy project. A half dozen selvage decorated cards would make a nice gift for a friend. Start by gluing a selvage to the front of the card with the ends extending past the paper edges.
 I like to use my walking foot and a #12 needle to sew the selvage to the card.
Continue layering the selvage and stitching down, folding under the last one before sewing it down to create a finished edge.
 Trim the selvages even with the card...
 refold and enjoy your one-of-a-kind card! 
 Another quick paper project is to stitch selvage onto a tag-board booklet cover.
 Fold under the raw edges before you stitch. These make great little "somethings" to slip into a birthday or get well card.
Stray cards need not stay neglected.
 With a little trimming, a paper punch...
 and a few cute selvages...
 you will quickly have some very special gift tags! (For the green tag, I just  glued on the selvages rather than sewing them down.)
 This stray Christmas card...
will soon decorate a gift for my little grand daughter's first birthday.
 And speaking of gifts, here's a fun no-sew idea...
Just glue color-coordinated selvages to the front of a plain gift bag. A little press with a hot iron will help seal them down. 
Well, this ends my week long focus on that extra inch of fabric that many quilters just throw away. 
I did the math and based on $11 per yard fabric, that one inch wide strip of selvage costs you 25 cents. Now, that's worth saving, don't you agree!

Thursday, April 3, 2014

Get Creative With Selvages

Only have a few selvages? No reason to wait till you have a whole basket full to have some fun. Get started with something small like this little name tag.
This was actually an old name tag that I repurposed with selvages. I just top stiched some selvages in a chevron pattern onto the muslin base and used selvage to bind it. Use any sweet pin you might have in your jewelry box to fasten it on.
 A potholder or rug mug is a great way to get started sewing with your saved selvages.
To make this one, I began with a 4 inch red square centered on top of an 8 inch muslin square. Lay this on top of a piece of Insul-bright or quilt batting. Begin stitching down selvages on either side of the middle square, simply stitching on the bound edge and then laying the next selvage over the raw edge of the one above it. When you get the first two sides finished, rotate and do the same thing on the other two sides, which will take longer selvage strips. Since you are stitching through all of the layers, it will be quilted as you go. 
 If your selvage strips are at least 1.5 inches wide, you can also use them for the binding just as you would bind any quilt. Here's the back of my pot holder. You can see the colorful fabric as the binding. I also did a little extra quilting to hold my backing onto the pieced front before I bound it. (Add as many layers of batting as you want to pad the holder.)
 On the front, you can see that I machine stitched the selvage binding down, folding under the corners.
 Making a pin cushion is another simple selvage project that only takes a few selvages. This one was made for me by my blogging friend, Cindy of Live a Colorful Life. She pieced together selvages to create a one of a kind personal touch just for me. Isn't it wonderful! As you can see, she used piping around the edges much like you would to make a pillow.
 The sky is the limit on quilt block patterns that can be used with selvages. Just create "fabric" with the selvages and then piece your new cloth into a a quilt or smaller project like this pillow top. Here is a tutorial for making this particular X-block pillow, if you are interested.
 Create fabric with your selvages to make any zipper bag or purse. Here's one that I made using a free make-up bag tutorial by Noodlehead.
I made the back of the bag with a solid piece of fabric, but it could be made of selvages also.
Zipper bags are wonderful for storing and carrying just about anything. You can't have too many!
You will have to collect quite a few selvages to make a quilt, of course. But, once your friends start hearing that you are using selvages, they will start gifting them, I'm sure! You can find the tutorial for my selvage quilt here.Yes, I'm still working on it. (Some of you know that my hubby thought that my selvages were trash and threw them all away, so I had to start going through my stash and cutting off more! I finally can laugh about it now!)
 I'd love to make a spiderweb quilt using selvages for the strips. I better finish this one first, I guess...but just imagine the strips as selvage and you get the idea of what it would look like!
 Friday I will finish up my week of selvage posts with a super easy no-sew project along with some other very quick to sew ideas.
Have I tempted you to start collecting yet? Be careful, you might even start buying fabric just because you like it's selvage!

P.S. I'm linking up with Live A Colorful Life for Really Random Thursday. Check it out!

Wednesday, April 2, 2014

Wear Selvages!

When the grass begins to green up and I think about putting away my wool sweaters it only seems right to sew up a few new spring outfits.  Lula likes that idea as well!
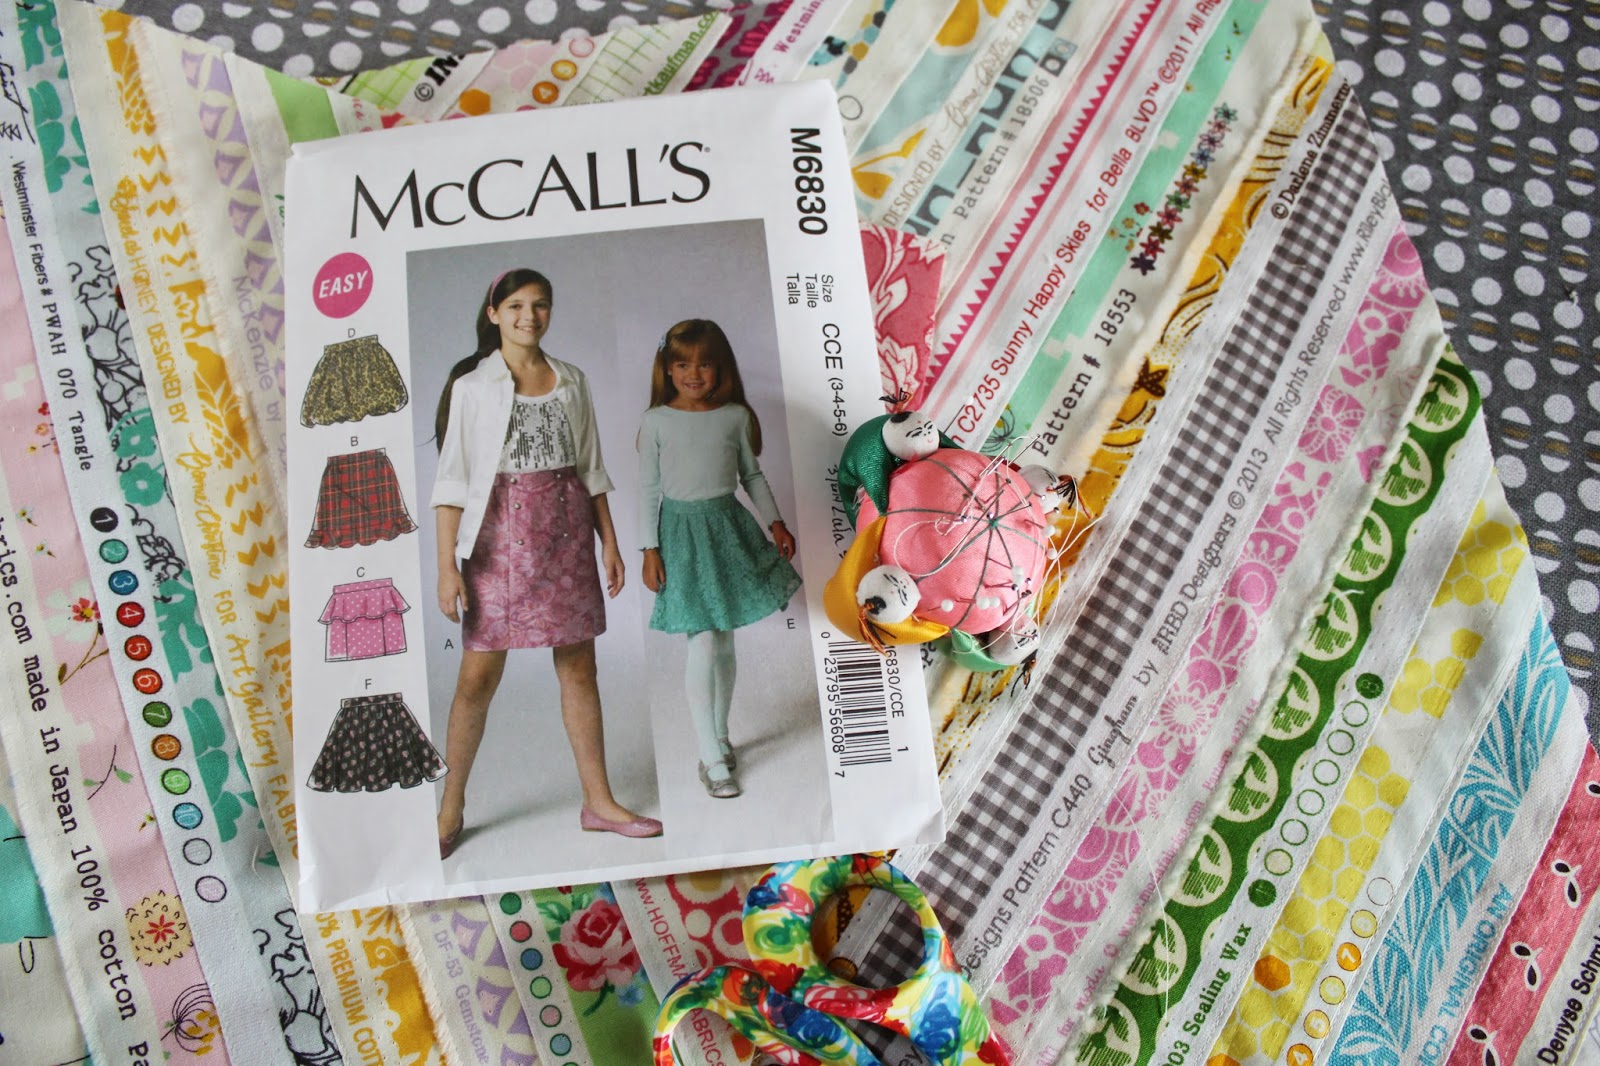
 Last fall I was intrigued when Shea made a cute selvage skirt for her little daughter. I've been thinking about trying it myself ever since. I couldn't really find an A-line skirt pattern in Lula's size so made my own using this McCall's pattern as a guide. I cut out the skirt from some Kona solid and covered the front and back with pastel selvages sewn on the diagonal.
 I generally cut my selvages from the yardage with one inch of printed fabric along one side.Beginning at the bottom of the skirt, I over lapped the selvages about 1/4 inch before stitching close to the bound edge. A favorite pink Aneela Hoey print made a sweet waist band.
 For Lula's slim figure, elastic in the back made fitting easy. If making an adult size skirt, I'd want to use a zipper opening.
 The skirt has a nice lined appearance with the Kona fabric inside. After zig zagging the seams, I top stitched on either side of the seam to keep the inside neat. As you can see, a length of selvage made perfect hem tape!
 Lula's new spring skirt is ready for the wearing when the warm weather arrives   for good!
 Last week, we were blessed with a rogue balmy afternoon while Lula and her sisters were spending several days in my care.
 With the daffodils beginning to bloom, it was nice to get outdoors and try out the new skirt.
 I think it turned out pretty adorable. I wonder what I should make next?
Maybe Jane would like a skirt too, or a new top to wear with shorts!
Pearl, on the other hand, looks happy no matter what she is wearing! I can't believe she's having her first birthday next week!
If you're enjoying some spring days, I hope you have the delight of seeing a bee with yellow pollen on it's legs. Now that's exciting!
Tomorrow: Some quick selvage ideas you might not have thought of.

Tuesday, April 1, 2014

Easy Breezy Selvage Tote Bag

Need a cute tote bag to carry your library books in?
 Hoarding fabric selvages but never making anything with them?
Well, have I got a project for you!
 First, rummage through your closets and find an old canvas bag that you probably never use because the emblem on the side is dated 2002, or something like that.Then, grab your handy dandy seam ripper and unstitch the sides, leaving the top inch, or so, sewn. (Ignore the selvages on the bottom. I'd already started on this when I remembered to take photos!)
 Now for the fun part! Beginning at the bottom of the bag,  sew on the selvages, one on top of the other till you have covered up the front of the bag. Stitch close to the woven edge on each selvage, covering the raw edge of the selvage below it. You can space the selvages close together or wider apart as I did, depending on how wide you have been cutting your selvage stash and the look you like. Let the selvage ends extend past the sides of the tote bag front.
 To finish off the top of the bag, place the last selvage with right side facing the bag front as shown in the photo below. Stitch, 1/4 inch away from the selvage cut edge. Then, fold the selvage toward the lower part of the bag to cover the seam.
 Finally stitch along the woven edge of the folded down selvage to create a sort of selvage flange. Trim the selvage ends even with the sides of the bag and restitch the seam that you removed earlier.
 Your one-of-a-kind bag is complete in nothing flat!
Now, go search for more discarded canvas bags and create one for all of your friends. You know they are going to want one!